How to Make Milk Kefir

Kefir - the champagne of milk
Kefir is one of the simplest probiotic foods to make. And you can add it to smoothies, baking, and make the most delicious spreadable cheese too.
Kefir has been consumed for well over 3,000 years. It originates from Caucasus and the term means "feeling good". Kefir is created when adding kefir grains to milk or other liquid. Finished beverages contains 30 different strains of microorganisms.
Milk kefir consists of a complex symbiosis of bacteria and yeast, whose activity forms small cauliflower like formations - better known as kefir grains.
Milk kefir contains a little alcohol, as the grains contains alcohol-producing yeast cultures.
More about probiotics & fermentation:

The kefir grains
When the grains are placed in fresh milk, the microorganisms ferment the milk and transform it to a tangy milk drink, with a high content of probiotic microorganisms. Moreover, the microorganisms contain the lactose metabolizing enzyme lactase, which digests almost all the lactose in the milk, so mildly lactose intolerant people will often tolerate milk kefir.
Kefir grains consists of polysaccharides (long sugar chains), colonies of microorganisms, minerals, fats and proteins, and they usually form new grains during each fermentation. The more and the bigger the grains, the larger milk portions can be fermented.
What milk should you use for making kefir
Prefer organic milk from grass fed animals.
Kefir can be made on all kinds of animal milk; the grains just need an adaption period if you change your type of milk. You will find that more grains are needed, for a smaller portion of milk to start with if you shift from cow to goat milk for instance. This is because the grains thrive best in the milk type they most recently have adapted to.
The higher the fat content, the more creamy and tasteful the kefir will be. It’s said that full fat or raw milk (unpasteurized milk) is the grain’s favorite milk, but they can easily ferment in skimmed milk too.
How to make Kefir from Soy Milk, Coconut Milk, Almond Milk and other non-dairy “milk”
You can use milk kefir grains to ferment other non-dairy milk, but as the bacteria thrive on lactose (milk sugar) they will need to be refreshed in cow’s milk after every 2-3 batches. The benefit of culturing non-dairy milk is that the fermentation process enhances nutrition and bioavailability. They are great for folks who are allergic to dairy or who prefer a non-dairy substitute.
Recharge the grains by resting them in milk for 24 hours. Use 1-2 cups of milk to refresh them.
The grains may be gently rinsed in nut milk to remove any traces of dairy before use. The grains usually also ferment in coconut milk, but in order for them to not lose their fermenting ability, they must be refreshed in animal milk after 2-3 batches in coconut milk in order to maintain its balance.
This recipe contains affiliate links.
Recipe
Equipment
Pot
Bowl or pot of porcelain or glass
Wooden spoon
Plastic strainer or Jelly strainer
2000 mL (4-8 cups) Preserving glass jar for the fermentation
A breathable cover for the jar such as a tight-weave towel, butter muslin, paper towel, or paper coffee filter
String or rubber bands
Sealed bottle for storage. I use these Italian Bormioli bottles bought on Amazon - 6 pcs. for about £23.
NB! Use only utensils of suitable plastic, ceramics or glass to handle the grains and kefir drink with, as the lactic acid can react to metals and coatings and contaminate the cultures.
Ingredients
4 cups (1 liter) of organic milk (cow, sheep, goat, soy, or coconut milk)
2 tbsp. Milk Kefir Grains - or ¼ cup (½ dl) from your last production
(1 tbsp. grains can usually ferment 2 cups (5 dl) milk in 24 hours at room temperature).
Directions
Note that steps 1 and 2 below are not strictly necessary, it’s just to reduce the risk of developing unwanted bacteria if you should want to use your kefir as a graft for your next fermentation.
Warm the milk up to 185° F (85° C)
Pour the milk into a porcelain or glass bowl and quickly cool down to 72° F (22° C), in a water bath or over some ice cubes.
Add the kefir grains or kefir from your last production to the milk (room temperature) and mix thoroughly.
Pour the milk into the glass container you want to ferment it in.
Leave 2-3 cm of air at the top of the container, as the grains will grow a little during the fermentation.
Cover with a cloth and secure it with a string or rubber band.
Let it ferment at room temperature for 24 hours.
Agitate the jar from time to time to ensure even fermentation of the milk
Pop the kefir in the fridge for at least 12 hours for further maturation (this step is called the 2nd fermentation, you can skip it, but this is what carbonizes the drink – the Champagne Effect…).
Strain the kefir grains from the milk.
Use a wooden spoon to mash the thickened milk through the strainer until only the grains are left.
Now the kefir is done and the grains are ready for new milk.
You can store your Kefir milk in the fridge for up to a week.
Second Fermentation
When the kefir grains are removed you can choose to second ferment your drink for the additional bacterial content, reduced lactose content, or simply for the improvement in flavor.
What Flavors to Add to the Second Fermentation
Only your creativity is the limit! But here are some Milk Kefir Flavoring suggestions:
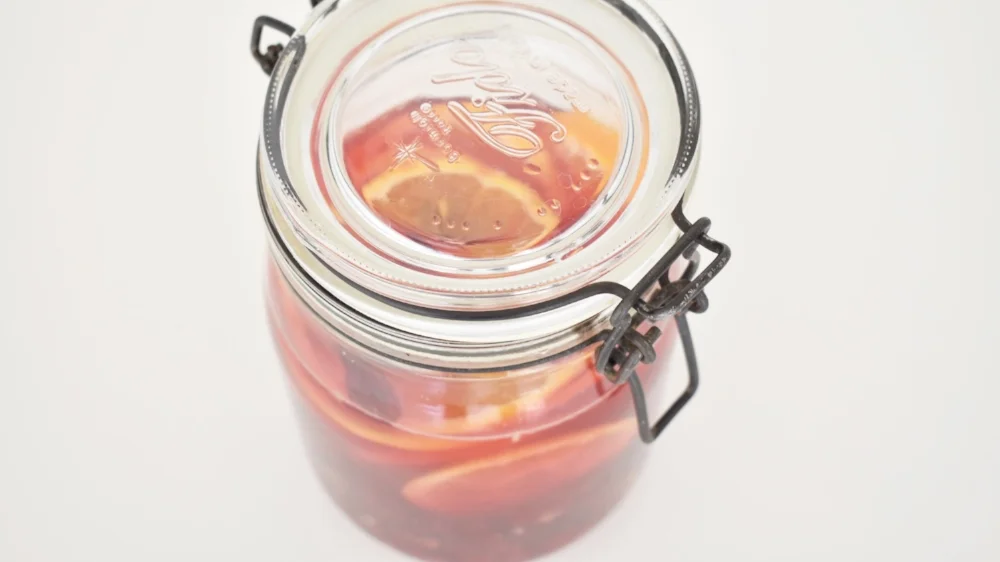
Citrus fruit peels
Vanilla + cinnamon
Cocoa powder
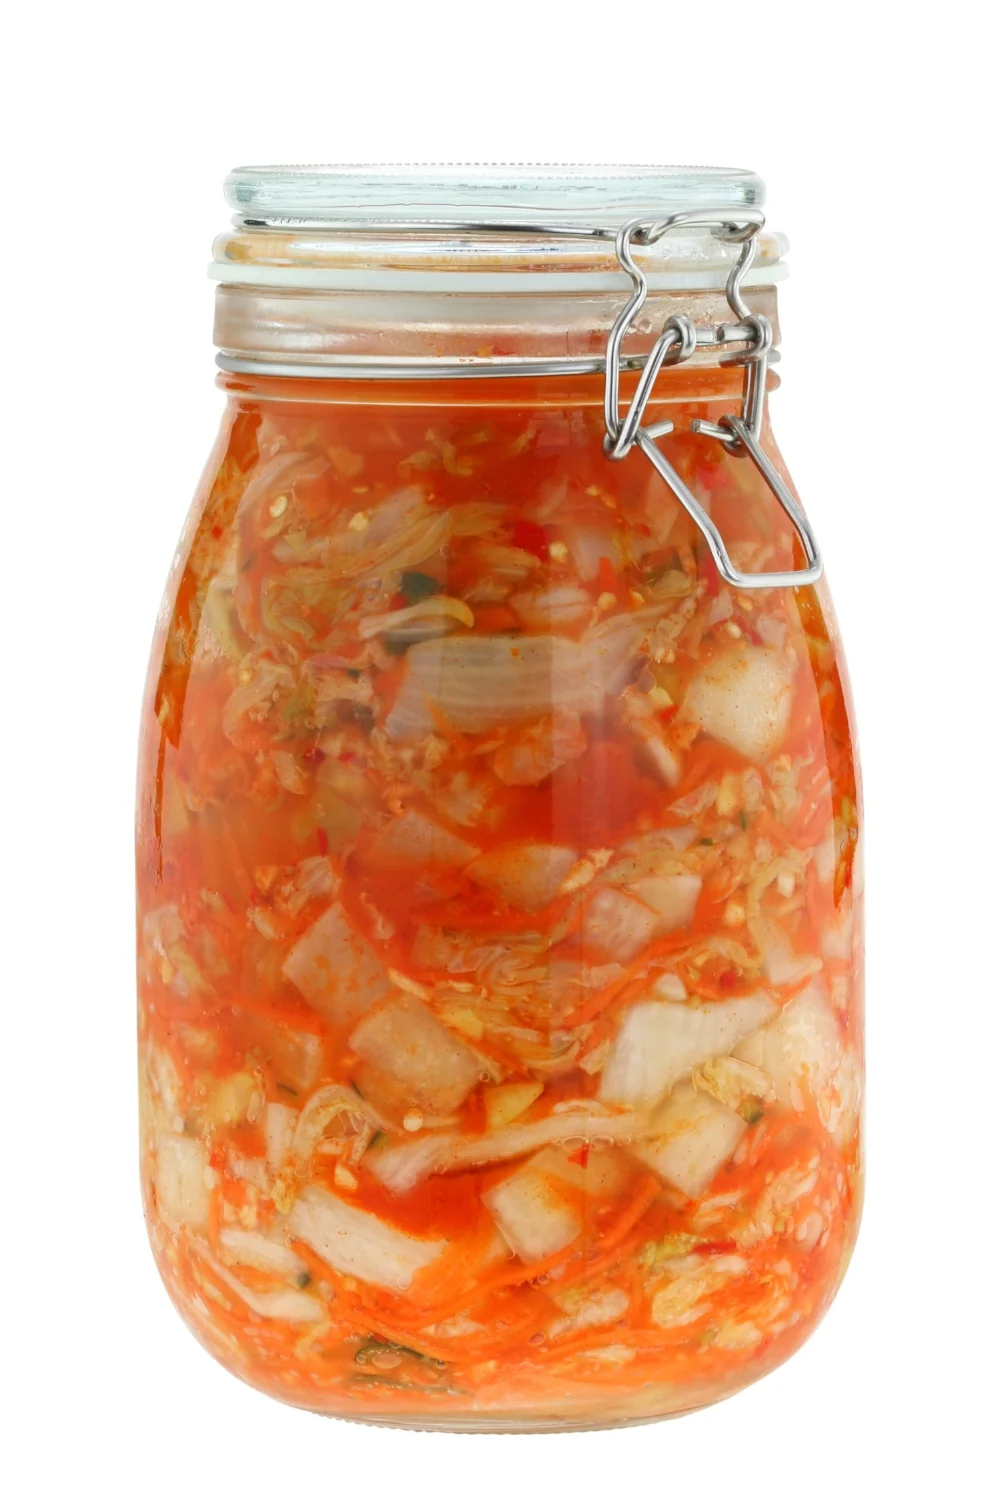
Garlic or onion (for use in savory kefir dip)
Chopped fruit
Chai tea bag + honey
Frothy Orange Kefir Beverage
How Long is a Second Fermentation?
A second ferment can range from 6 to 12 hours, or more or less, just depending on the culturing conditions of your home and taste preferences.
Taste your kefir frequently during its second ferment to get a feel for how the flavor changes over time.
Nice to know about the kefir process
Co2. The kefir culture will create built-up gases if you seal with a tight lit.
Fermentation time. How much time your kefir needs to ferment is a matter of taste. Shorter times provide a thin and mild drink, while longer times gives a more viscous, full-bodied but also more sour drink. You can ferment for 24-48 hours, but no longer than 72 hours, or the grains will begin to disintegrate.
Whey. A clear layer can appear at the bottom of the jar - that is whey. Most prefer to harvest milk kefir prior to this separation, but if it is separated, give it a stir and then flavor as needed.
2. Fermentation. Once the grains are removed, you may add flavors for a second fermentation or drink straight (see the section above)
New Grains. When your milk kefir grains first arrive they might need some nurturing before they are ready to ferment. Milk kefir grains are more delicate organisms than the hardier Kombucha so they may need a brief period of re-nurturing from their trip before they fully adjust to their new home. If the first batch or two doesn’t taste as good or immediately reproduce, don’t worry! Keep changing the milk and after a few batches, they will micro-adapt to their new environment.
Hygiene. If you are careful with the hygiene, the procedure can be repeated over and over again based on your last production.