The Best Gluten-Free Focaccia – and So Easy to Make
“I think this is the best bread you’ve ever baked,” my husband said last night, with his mouth full of bread.
He’s British and normally loves ultra-white, super-gluteny toast bread – but this focaccia shook his faith in gluten, I think.
Gluten-free baking is often about compromise. I’ve honestly grown a bit tired of the strong taste of buckwheat, so I was thrilled when I discovered tapioca, sorghum, and millet flour.
These flours give gluten-free bread a whole new dimension – you don’t miss the gluten at all. And with this focaccia, my husband and I are in full agreement: it's sooooo good.
You’ve got to try it.
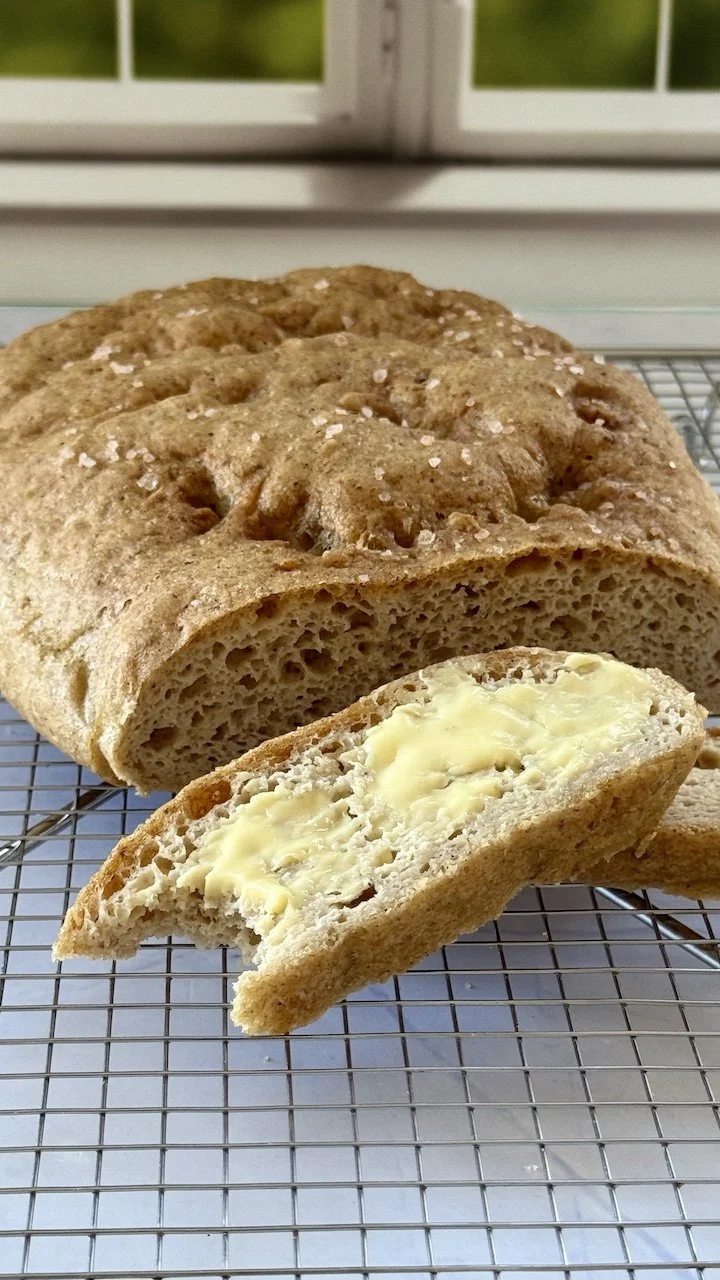
This gluten-free focaccia recipe is your new go-to for perfectly crispy crust and a soft, airy crumb — no xanthan gum, no weird texture, and no one will guess it's gluten-free.
Made with a balanced mix of millet, sorghum, and tapioca, this bread rivals any wheat-based focaccia — and it's naturally dairy-free and vegan-friendly.
Whether you’re gluten-intolerant, eating paleo-inspired, or just want a better bread, this recipe delivers bakery-level results with simple ingredients and step-by-step guidance.
About the Ingredients
Psyllium Husk
Psyllium husk is essential in gluten-free baking. It helps mimic the structure that gluten normally provides. When soaked in water, it forms a gel that adds elasticity and lift to the dough – preventing it from becoming gummy or dense.

Instant Dry Yeast – Easy and Reliable
I use activated (instant) dry yeast, which can be mixed straight into the dry ingredients – no blooming needed. It makes baking easier and more reliable.
I use Doves Farm gluten-free yeast.
Apple Cider Vinegar – A Tiny Tangy Trick
Apple cider vinegar creates a slightly acidic environment that gives the yeast a natural boost.
I recommend Beutelsbacher's, which is Demeter-certified and deeply organic.
Olive Oil – For Flavor, Crust, and Texture
Just a few tablespoons of olive oil in the dough make a huge difference. It creates a more open crumb, a thinner, crispier crust, and adds depth of flavor.
I only use extra virgin olive oils from certified organic farmers.
I say: Good oil = better bread
Sorghum Flour
Sorghum is an ancient grain originally from Central Africa.
It’s gluten-free, naturally rich in minerals, and has been cultivated for over 8,000 years. It looks a bit like wheat, but with two major differences: no outer husk and no gluten.
Bonus: Sorghum is environmentally friendly – drought- and heat-tolerant, and even helps trap CO₂ in the soil.
Millet Flour
Millet flour is a great substitute for wheat flour in gluten-free baking – it has a mild, corn-like taste and a smooth texture. It makes the dough feel soft and elastic.
Tapioca Starch
Have you heard of tapioca starch?
It’s a bit of a secret weapon in gluten-free baking, and a permanent staple in my kitchen.
Tapioca is a starch extracted from cassava root, a dietary staple across Africa, Asia, and South America. Today, it's also popular in paleo diets – it's grain-free, nut-free, and gluten-free.
It’s neutral in taste and smell, which makes it easy to use in both sweet and savory recipes.
In baking, it acts almost like gluten – binding ingredients together and giving the final bread a soft, airy, flexible texture. Without it, the bread can turn out dense and crumbly.
You can substitute it with potato starch, but I find tapioca gives a more delicate crumb – especially in recipes like this focaccia.
Kneading & Proofing
Kneading – How to Handle Gluten-Free Dough
Start by mixing the dough with a hand mixer and dough hooks – it makes the process smoother.
Then continue kneading on a surface lightly greased with olive oil, so the dough doesn’t stick too much.
You can also mix it by hand if you prefer.
Using a stand mixer? Use the dough hook and mix on low to medium speed for 4–5 minutes, or until smooth.
Gluten-free dough is different: it’s softer, stickier, and less elastic than wheat dough.
But it should still have some stretch. You should be able to pull and lift small pieces without them tearing immediately – that’s a good sign it’s ready.
Note! Don’t add extra flour, even if it feels sticky. Gluten-free dough needs to stay soft – too much flour makes the bread dry and dense.
Shaping the Focaccia
Once the dough is kneaded, it’s time to get it into the pan.
Line a baking pan (approx. 24 x 33 cm / 9.5 x 13”) with parchment paper, and grease the paper generously with olive oil.
This prevents sticking and helps form a beautifully crispy bottom.
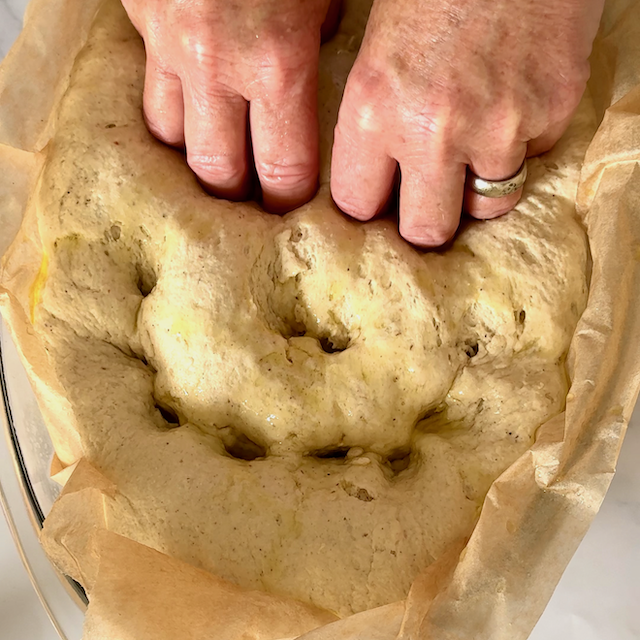
Transfer the dough to the pan, and use lightly oiled hands to gently press it out to the edges and corners. Don’t worry if it looks a little uneven – it will smooth out during proofing and baking. Focaccia is meant to look a bit rustic.
No need to "shape" the dough like a loaf – just focus on evenly distributing it in the pan. The olive oil helps here, too: it makes the dough easier to handle and spread.
Proofing
Let the dough proof in the pan.
Cover it with a damp tea towel or plastic wrap, and set it in a warm, draft-free spot.
Let it rise for about 1 hour, or until visibly doubled in size.
Need a warmer proofing environment?
Pop the dough into a turned-off oven with a bowl of hot water inside. The gentle warmth and steam help the dough rise beautifully.
While the Dough Proofs – Prep the Oven
While the dough is proofing, get the oven ready.
Both heat and humidity are key to a great result.
Preheat the oven to 220°C / 425°F, ideally with convection and top/bottom heat.
Place a baking stone, baking steel, or heavy-duty baking sheet inside the oven to heat up – this gives the bread a wonderfully crisp bottom.
About 5 minutes before baking, add an oven-proof pan with boiling water to the bottom of the oven.
Leave it in for the first 15 minutes of baking – the steam keeps the crust soft enough to allow for oven spring (that last burst of rise).
With a hot oven, a hot stone, and just the right amount of steam, you're all set for perfect focaccia.

My Oven Setup: Baking stone + dish with hot water for steam.

Recipe: Easy Gluten-Free Focaccia
Prep time: 20 min
Proofing time: 1 hour
Bake time: 40–45 min
Total time: 2 hours 5 minutes
Equipment
Hand mixer with dough hooks or stand mixer
Baking stone or steel (optional)
Ingredients
Dough:
20 g whole psyllium husk
540 g lukewarm water
160 g millet flour
155 g tapioca starch
110 g sorghum flour
10 g instant yeast
8 g salt
10 g olive oil
10 g apple cider vinegar
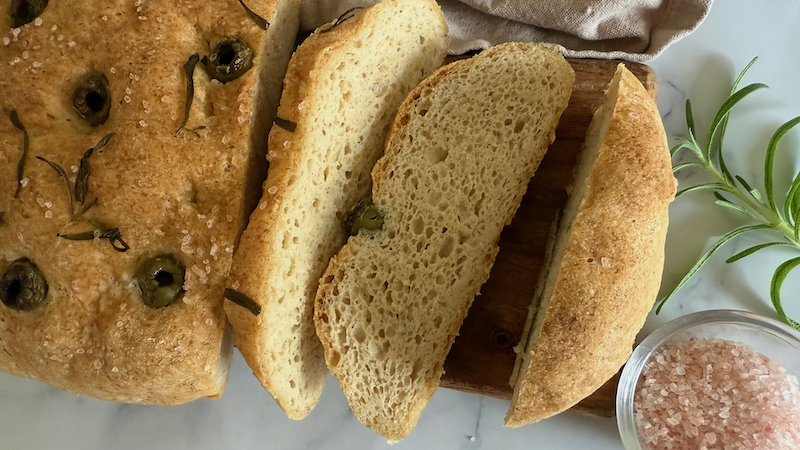
Topping:
3 tbsp olive oil
14–16 green olives, pitted (optional)
Fresh rosemary (optional)
Tips
Focaccia is best fresh from the oven, but it actually keeps well in a sealed container at room temperature until the next day. To revive it, just reheat in a 200°C / 400°F oven for about 10 minutes – this softens the crumb and crisps up the crust beautifully.
Or, for a super quick option: toast a few slices. Still wonderful.
Instructions
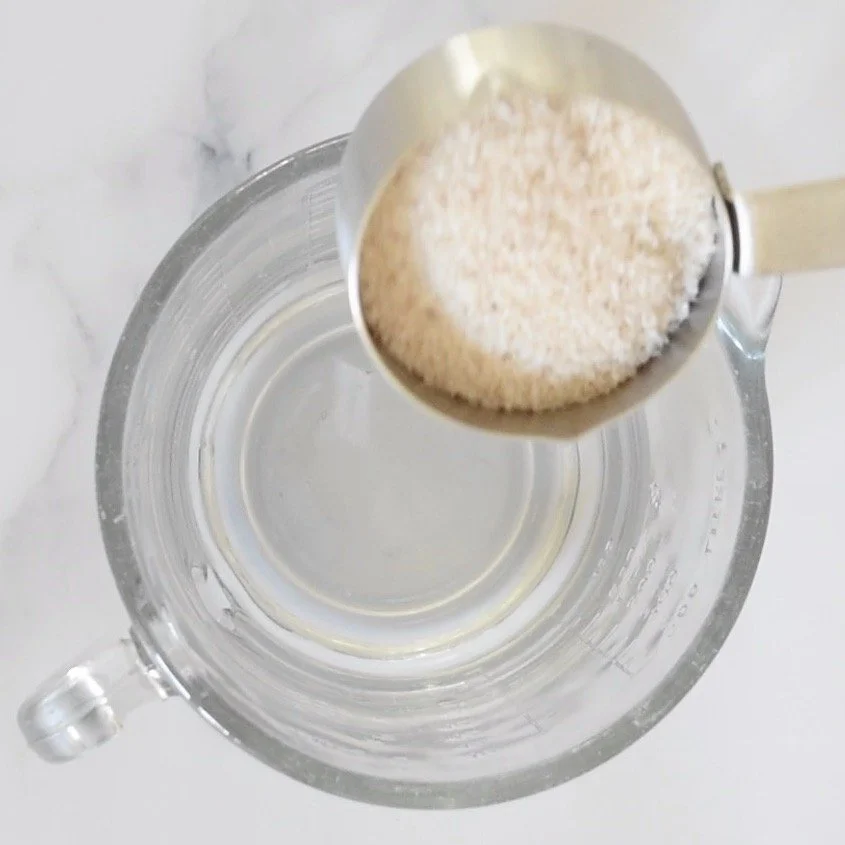
1.Make the psyllium gel
Mix the psyllium husk with lukewarm water and let sit for 1–2 minutes until thick and gel-like.
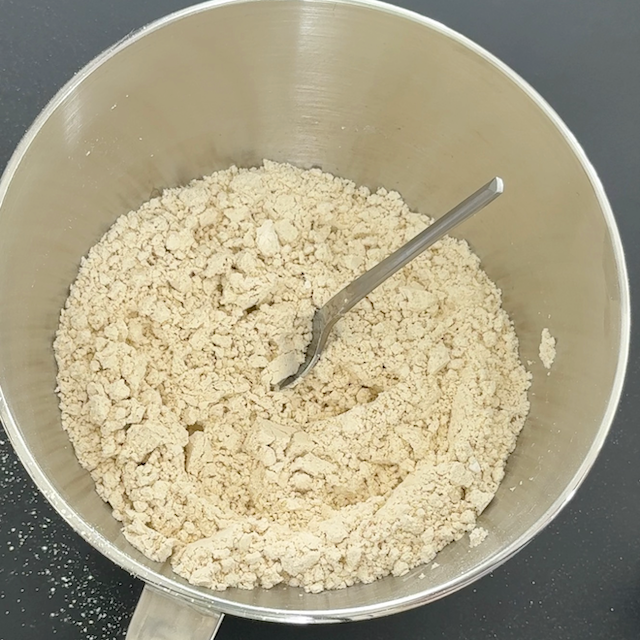
2. Combine the dry ingredients
Whisk together the millet flour, tapioca starch, sorghum flour, yeast, and salt.
3. Add the wet ingredients
Stir the olive oil and apple cider vinegar into the psyllium gel. Add this to the dry ingredients and mix well until a smooth, soft dough forms.
4. Shape the dough
Line a 9.5 x 13” pan with parchment paper and grease with olive oil. Transfer the dough and press it out evenly with oiled hands.
5. Let it proof
Cover with a damp towel and proof in a warm place for about 1 hour, until puffed and doubled.
6. Preheat oven and prepare steam
Preheat to 220°C / 425°F with baking stone or sheet inside. 5 minutes before baking, add a dish of boiling water to the oven.
7. Add topping and bake
Drizzle dough with olive oil, dimple with your fingers, and top with olives, rosemary, and flaky salt.
Note that the focaccia is also delicious with only olive oil and salt as toppings
Bake for 40–45 minutes,
Important: Remove the water dish after 15 minutes.
8. Cool and enjoy
Let the focaccia cool on a wire rack before slicing – this helps set the crumb.